Monday, May 31, 2010

Memorial day haul

I went to Nordstrom today to check out their Memorial Day sales... they didn't have any but I still got a few things I've been wanting to try.  Some of these are gifts with purchase.  If you would like a review on any of these products, do let me know!

Laura Mercier Pressed Setting Powder in Matte Translucent
Mac Lip Glass in C-Thru
Lancome Color Fever Gloss in Inferno
Smashbox Photo Finish UVA/UVB SPF 15 Foundation Primer
Clarins Younger Looking Balm
Clarins One-Step Gentle Exfoliating Cleanser
Lancome Hypnose Drama Mascara
Lancome Definicils Mascara
Lancome High Resolution Eye Refill -3X
Lancome High Resolution Refill -3X
Laura Mercier Flawless Skin Creme
Lancome Ombre Effects Sensationnels Eyeshadow Quad
Lancome Bi-Facil Double Action Eye Makeup Remover
Smashbox High Definition Healthy Fx Foundation in Medium M2
Mac 187 Brush
Lancome GWP makeup bag

I am really into mascaras right now so I will probably be posting my opinion on the Lancome Hypnose Mascara pretty soon.  I am also really excited to try my new Smashbox Foundation... we'll see how this one works for me. 

Sunday, May 30, 2010

Update: NYC cover stick

As promised on my last post/review for the NYC cover stick, here is my first update on the product. 
I ended up going to bed last night at 1:30am (hubby and I went out to watch a movie together, probably the last one for the next 2 years, that's what having kids to do to you!) so that was 14 hours after applying my makeup.  Most of my face looked intact (kudos to my Lancome foundation for lasting so long!) except for my chin, I am not sure if it has to do with the concealer or maybe because I touch my chin a lot (I know, that's just one of my weird things!) or because I was eating extra buttered popcorn while watching the movie and maybe the butter touched my chin? I don't know yet but I will keep an eye on it definitely. My forehead and cheeks looked fresh, no signs of blemishes or acne scars showing through my foundation so I would say that so far I am still impressed with this concealer.  It is still too early to tell if my skin will "accept" this product but I sure do hope so. Another thing I noticed that I thought was different was when I was washing my face, I noticed that the first thing that came off was my foundation, my cleanser usually cleans everything at once, but this time I could actually see the green concealer all over my face on the spots I applied prior to my foundation, I thought that was kind of weird but it also tells me that it has some good sticking power.  Anyways, I will keep you all posted as I keep on testing this concealer over the next few days.

Saturday, May 29, 2010

Drugstore Find/Review: N.Y.C Cover Stick in Green

I went to walmart yesterday and stopped by the cosmetics section to see if there was something that would call my name.  I am not a big fan of drugstore makeup mostly because they usually make me break out but I still wanted to try something new so I gave it a "go!". 
I bought a few things that I am going to be posting reviews of in the next week or so but I couldn't help myself to tell you about this NYC concealer I am currently trying. 
The NYC website retails this concealer for $1.99 but I am pretty sure I paid $1.39 at Walmart (I lost my receipt, so me!).  They come in a variety of colors but I just got the one in green.  I figured if it doesn't work I am not going to loose that much money.
I will be honest with you all, I was not excited at all to try it.  I guess I always think you get your money's worth when you buy something and I didn't think I would get that much out of this really inexpensive concealer... I was wrong!
If you read my very first post you know that I prefer Make Up For Ever Concealer Palettes, this palette retails for $39.00 and it comes with 5 different colors, including green to counteract redness.  That is a lot of money to spend on concealer and you still need to buy a brush to apply it with but I still bought it and liked it a lot.  I am telling you this because I will be comparing my NYC cover stick to the MUFE concealer palette, specifically the green color.
I didn't think to take a "before" picture until after I had applied foundation on half of my face.
Here are some of the things that I liked about it the most as I was applying it today, please notice I have only wore it ONCE, as far as I am concerned this concealer is still on the "testing" stage.
1.- It comes with quite a bit of product, I would dare to say that it has maybe twice as much as my green concealer on my MUFE palette.
2.- Application was extremely easy. I didn't need to use a brush.
3.- I didn't have to get my fingers dirty trying to blend it , I guess I could have if I wanted to but since I apply it before my foundation I really see no point on doing that.
Half of my face already has foundation on.  It looks just as good as if I had applied my MUFE concealer.
(On my forehead I am using my regular mufe concealer, I only bought NYC concealer in green
Right after I applied foundation my cheek... I think it looks pretty flawless, if you ask me.  
What do you all think?  Looks pretty good, blemish free! 
Something else I noticed:  I usually do TWO pumps of my foundation for my whole face BUT today I had all of this foundation left... could it be because I needed less coverage because of this new concealer?  Too early to tell but I was very happy to have used less foundation.

I will be posting an update of this product tomorrow morning and in three days.  I still need to see how long and how well it stay on my face AND the most important thing, if will make me break out.
As of right now I am extremely happy with this product.  I won't be buying any more colors until I test it a little longer and I am keeping my fingers crossed that this will work for me.

If you would like to read the "next day update" on this concealer, click here.

Friday, May 28, 2010

Going to bed with makeup on?? I don’t think so!

We all love looking great during the day, I mean, why else would we go through all the trouble of applying makeup on if not, right?! And that’s great but something that most of us girls don’t really pay too much attention to is how to care for your face at the end of the day, and that is equally or even more important.


We’ve all done it in the past, either because we are too tired or we just don’t care, but going to bed with makeup on is a big NO-NO. But “why?” you ask? Let’s think about it for a moment… Our skin is covered with millions of little pores everywhere, this pores absorb dirt, oils and makeup, when this happens our pores can’t “breathe” and that’s when we start breaking out. You will be less likely to have breakouts if you clean your face thoroughly every day. The fact of the matter is that your makeup will look a lot better if you apply it onto a healthy, clean surface.

But how to do it? You DON’T need high end products to keep a clean face, there are plenty of drugstore brands to choose from that are very inexpensive. Here are some tips that you might find helpful:

1st. Remove any heavy eye makeup with a cotton ball and eye makeup remover.
2nd. Wash your face with a mild soap. Pat dry.
3rd. Put some toner on a cotton ball and wipe your face with it. This will remove all the impurities that the makeup remover and the soap didn’t get.
4th. Apply a moisturizer on.

Now you are ready to go to bed with a clean and refreshed face.
* For all of you that are wondering: YES, I follow these steps everyday, twice a day.

Thursday, May 27, 2010

Review: Smashbox Camera Ready Full Coverage Foundation Spf 15

Price: $38.00
Where to buy: Smashbox counters, sephora.com, sephora stores, smashbox.com, etc.
Description: A lightweight yet buildable cream to powder full coverage foundation that’s good for your skin. This luxurious, creamy formula glides on effortlessly leaving a semi-matte finish without being cakey or heavy... this foundation leaves skin looking naturally flawless.
I am going to make this short and simple (yeah, right! this is probably going to turn out to be one of those never ending posts!):
Once again, in my search for the perfect foundation I gave this one a try.  Up until that point I hadn't tried any smashbox products (besides for my brow brush) and I really wanted to, I've heard so many good things about their primers so I thought their foundation had to be pretty good as well... anyway, so I ended up buying this one, what attracted me to it is the fact that is full coverage. 
Here are the facts:  This foundation is called "camera ready" for a reason... it makes you look awesome in pictures... and I will give it that, you will most definitely look good in photos... but what about in person??? That, my friends, is the question!
Let me start by saying this: Application absolutely SUCKS! Excuse the language, but that is trully how I feel. This is a cream to powder foundation, so I was a little out of my element when applying it at first, I am used to liquid.  The first time I tried it with the brush that it comes with, I applied concealer, primer and my clarins cream prior to it... it did NOT look good.  The second time I tried it with my mac 130 brush and applied the smashbox primer instead of my mac one... didn't make a difference.  Third time I didn't apply my concealer on first, hoping that it would look less cakey, nope... didn't work. And yesterday I gave it a try one last time, I wanted to take pictures to show you all what I mean when I say that "it didn't look good" and once again it did NOT look good.
The thing with this product is that it only looks bad when you see it up close.  If you are to look at yourself in a mirror from, let's say, 4 feet away you are going to love what you see! I don't know what it is with this foundation but from far away it makes your skin look even toned and like it really does provide full coverage.  When you see yourself up close is when you start having issues with it.  Just look at the pictures:
It settles into every little fine line or dryness you may have on your skin.  My Clarins cream did nothing under this foundation.  Notice my nose and pores on my cheek? My regular foundation does NOT make me look like this.
Look at all of that cakeyness on my forehead! And this is supposed to be a full coverage foundation... well, what do you think?! I can still see my acne scars under it!
And around my lip and my cheeks... more cakeyness... this foundation looks nothing but natural, at least not up close. 
Please note that I tried really hard to blend this foundation onto my face and these pictures were taken after me blending and blending it like a maniac.
Would I recommend it?  NO, NO, NO!  Unless you are a model and all you do is take pictures for a living or you won't have any close up human interaction, than this foundation is not for you.   It is impossible to apply it so that it looks natural, oh, I should point out that that the lady at the Smashbox counter told me to use their smashbox face and body brush with it to achieve the best results but I am not going to spend $52.00 on a brush just for that foundation! So maybe if you do apply it with this brush it would look better but I honestly don't think so.
I am wearing this foundation on this picture, see what I mean by looking good in pictures?  But who cares if you look good in pictures when in person your face looks cakey and you see the product settle in all your fine lines and dry spots on your skin!  I am sad to say that this baby is going back to the store.  I really wanted it to work, for once I found a foundation that matches my skintone perfectly... so I guess my search for the perfect foundation is still on. 
I rate this product a 1 out of 5

Wednesday, May 26, 2010

Tutorial: Black and blue smokey eye

I was browsing the web in search of a look to do for today and I came accross this picture and I liked it a lot.  I mean, what's not to like?  She's wearing black eyeshadow: my most favortie eyeshadow in the whole world! And the Blue just adds a touch of color to it...
Here is my version of this look:
First, you need to apply an eye primer all over your lid.
Then you need to apply a black shadow base from the crease down, do not apply on the inner or outer corner of your eye. 
Apply a very thin line of the same black shadow base under the lower lashes.
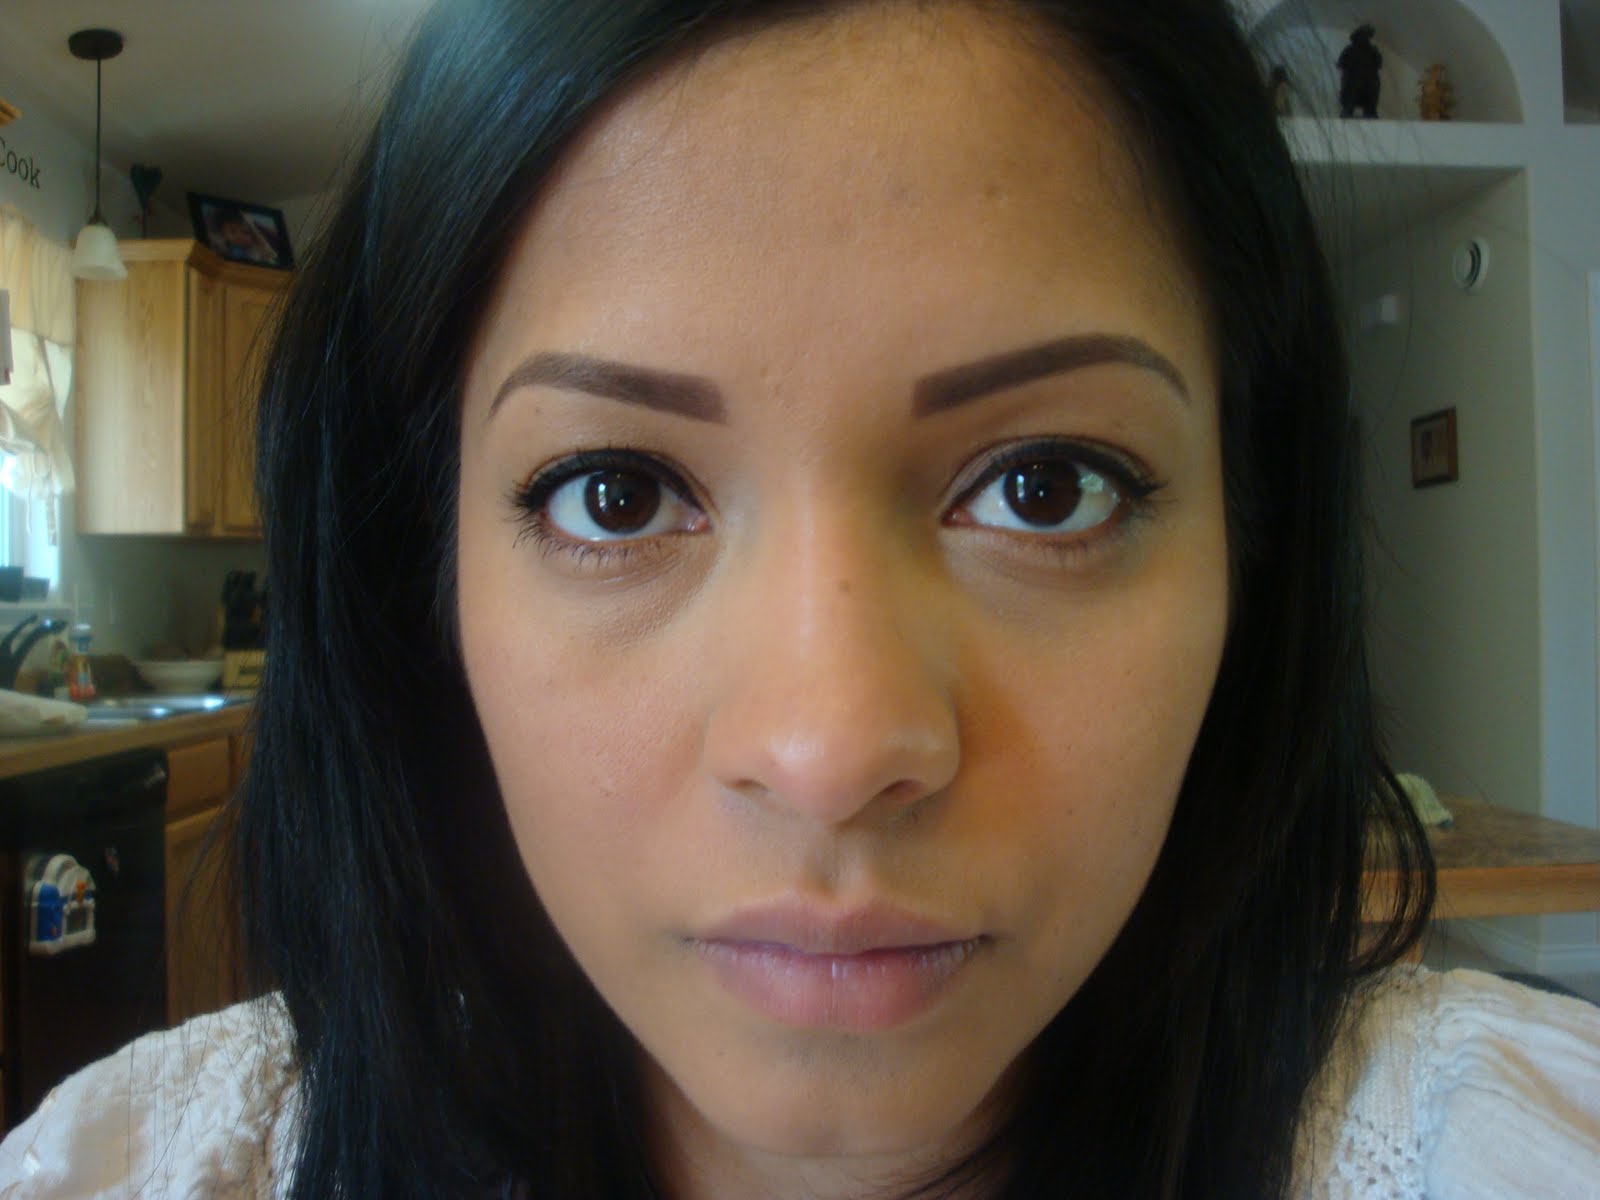
You are going to look something like this, but don't worry, it will get better, I promise!
 Now we need to apply our eyeshadows: 
Grab some black eyeshadow on a brush and...
...dab it on top of the black shadow base you applied before. I highly recommend you dab it on, black eyeshadow for some reason causes a lot of fall out, also, apply your concealer AFTER you do your eyes. I am using a bareminerals eye brush.
Next, using a small crease brush, I am using a Mac 219, grab the blue eyeshadow of your preference...
...and apply it to your crease, just like the picture below shows.
Now we need to blend all of those harsh lines.  Using a blending brush grab some eyeshadow that's neutral in color, I use one that's close to my skin tone.  Personalize the shadow to your own skin tone. I am using a Sigma SS217 brush.
Using "windshield wiping" motions blend in the colors in  your crease until you see no more defined lines.  Apply more black eyeshadow if needed.  
Use any kind of brush you like to apply highlighter to your eyebrow bone. I am using a Sigma SS227.
Using the same brush you applied the blue to your crease, apply some blue eyeshadow under your lower lashes, like this:
We want the black shadow base we applied under the lashes to show some more, so use a small flat liner brush and apply black eyeshadow as close to the lower lashes as you can.
Apply any kind of black eyeliner on your top lids, again, really close to the lash line.
Apply eyeliner to your water line, mine is supposed to look blue but I guess I didn't use too much to show.
And finally, curl your lashes, apply a couple of coats of mascara on both top and bottom lashes. 
And voila!!
I think I got pretty close to the look in the first picture.  I hope you all like it.  If you have any questions on the shadows I used, do let me know in the comment area. 

Beauty Tips: Preventing Eyeshadow creasing

Have you ever applied your eyeshadow and a couple of hours later when you checked in the mirror it looks like this ==>


I know I have had this problem happen to me many times in the past, not anymore though, I found the solution for it and it's as simple as using an eye primer!
So, what is an eye primer?? I tried googling that question to come up with a better answer but found nothing, so here is my own definition: An eye primer is a product that you apply onto your lids before applying your eyeshadow. Eye primers usually come in very neutral colors and in a cream-liquidly form. A primer will prevent your eyeshadow from creasing and make your eyeshadow color pop!
How's that for an answer! LOL! There is a huge variety of eye primers in the market right now, they go from reasonable prices to the high end ones that are not easily affordable. But, is it worth spending the money on one of these? YES!! Absolutely YES!! If you are anything like me and love wearing tons of eyeshadow and want it to stay put all day and all night long, than you definitely need one of these babies!
A good way of getting introduced to eye primers is by using Mary Kay Eye Primer. This is one of the least expensive ones out there and it does do a good job.
I won't get into the ones that I have tested, that's a different post, but here are some examples of some really popular high end eye primers that will give you great results, the prices vary from $16.00 to $24.00.

From Left to Right: Urban Decay Primer Potion, Too Faced Shadow Insurance, Bare Escentuals Prime time for eyes, Smashbox Photo Finish Lid Primer, Benefit Stay Don't Stray Eye Primer.

Another alternative for keeping your shadow on all day long is a shadow base. Just as with eye primers, there is a huge variety out there for you to choose from. But what is the difference between an eye primer and an shadow base? Once again, here is my own definition: Both, eye primers and Shadow bases, will keep your shadow from creasing. A shadow base, however, comes in a range of different color to choose from. They can be used by themselves or under your eyeshadow. So for instance, if you would like to wear a blue eyeshadow, then by applying a blue eyeshadow base prior to it, your shadow color will pop a lot more than if you used an eye primer underneath it, and it won't crease either (I really hope that made sense).
I personally use an eyeshadow base underneath my eyeshadow all the time, it doesn't make it the right or wrong way of keeping your eyeshadow from creasing, that is just my personal preference.
Here are a few examples of eye shadow bases that I would recommend you try, some are better than others, or more affordable, or come with more product in the jar, but again, I won't get into that right now:

From left to right: Estee Lauder Double Wear Stay-in-Place ShadowCreme, Mac Paint Pots, Bobbi Brown Cream Shadow, Clinique Shadow base.
If you would like to try a drugstore eye primer, Loreal came out with their De-Crease Shadow base. This eye primer is supposed to keep your shadow on for 8 eight hours.

And finally, I haven't tried this method myself but I have heard that some people like it, is using a concealer underneath your shadow, I honestly don't know how well this works but I will give it a try soon and let you all know.
Ladies, now you know the trick to keeping your eyeshadow intact for hours and hours!

Tuesday, May 25, 2010

Review time: Clinique Deep Cleansing Emergency Mask


Price: $19.50
Where to buy: Clinique stores and counters.  Sephora and Sephora.com.
Description: Clay-based treatment for oily, pore-clogged, skin-under-stress.

I have used this mask for a month now and I must say I am very impressed by the results I achieved with it.
I have never used any other kind of mask besides this one so I guess I don't have a way of comparing it to anything, I did, however, read a ton about clay based masks before deciding to purchase this one and noticed how one of the main complains is that the clay irritates the skin.  I did not have that problem with this mask.
On sephora.com this product is rated 4.4 out of 5, which is a pretty good score I think.  This product is only to be used once a week.  When I first bought it I was a little worried about it not lasting too long, after all, for $19.50 I expect to have a product that will do what it says it will do and that it will last me a good while as well.  I will say this: my worries were completely unbased.
The instructions tell you to apply a thin layer all over your face and let it sit for 5 minutes and then wash it off with warm water.  When you first squirt the mask on your finger it sort of feels like a thicker cream or a thinner toothpaste, if that makes any sense. It doesn't have a bad smell at all and it's pretty easy to apply.  I always make sure to get my hair out of the way because it can get pretty messy.
I like to apply a little bit extra on the areas that I want more cleansing, like my nose, my chin and around my lips.  I don't really know if that makes a difference or not but I still do it.  When you first put it on your face it feels smooth, like a cream really, but as it sits for a few minutes it starts to harden and pretty soon it feels like you have dry mud on your face.  Washing it off is relatively easy, all you need is warm water. 
What about the results?  Right after you wash the mask off the first thing you notice is how soft and refreshed  your face is.  After my very first time using it I noticed that a good amount of my black heads had dissapeared.  After the second use (a week later) I had less black heads and now (a month later) I have absolutelly none.
Do I recommend it? YES! Absolutely yes.  This mask is amazing.  It doesn't irritate your skin and it does as it promises. Is it pricey? Well, yes it is, but one tube will last you a long time!  I would say I still have about 70% of the mask left.  I don't have anything bad to say about this product so I give it a 5 out of 5.

Monday, May 24, 2010

Beauty Tip: How to get your eyeliner to last all day long

If you like using eyeliner but have had a hard time keeping it on all day, than this post is for you! Read on!
Using a good quality eyeliner is important, high end brands like Mac or Urban Decay will last you all day already, but if you don't have these products than this tips will really benefit you!
I have used many -MANY- different kinds of eyeliners in the past in search for the perfect one, I won't get into that right now, that's a different post, but for the sake of this post I will use my Mac Gel liner in Blacktrack and an eyeliner brush.  Please note that you can use this tips with any kind of eyeliner you use, it can be gel, liquid, pencil, whatever!
Begin by eyelining your eyes, I am doing a cat eye eyeliner today.  Make sure to apply it as close to your lash line as humanly possible, failure to do this will just make you look funny. For instructions on how to do a cat eye, click here
This next step is optional.  I like lining my waterline as well.  This will just give it a more defined illusion that I have thicker lashes.
I know it's not a pretty picture, a girl's gotta do what a girl's gotta do!
The main purpose of eyeliner is to make your eye apper as if they have thicker, fuller lashes.  To achieve that you must apply your eyeliner correctly and as close to the lash line as possible.
Next, using a flat eyeliner brush (I got this one about 3 years ago, its a Maybelline one and I think it costed me about 3 dollars), you are going to apply black eyeshadow on top of your liner.  If you are using a different color or liner, make sure to match the eyeshadow to your eyeliner.
And go ahead and apply a coat of the black eyeshadow all over the liner.  The black eyeshadow will act as a "setting powder" for your liner and it will help keep it on a lot longer.
It will also help your eyeliner look more defined and the lines a lot sharper.
And there you have it, your eyeliner will last you all day long!

Sunday, May 23, 2010

Beauty Tips: How to achieve the perfect Cat eye

I have been asked quite a few times how do I achieve that perfect cat eye eyeliner look.  So I thought I would put together a little tutorial on how to do it.  Achieving this look can be somewhat complicated if you don’t know what you are doing, but that’s what I am here for… to guide through it step by step.
Here is what you are going to need:  Eyeliner brush and liquid eyeliner or gel liner.

Begin by looking straight to your mirror, when you do this your eye naturally creases, take an eyeliner brush and follow along to the lower lash line, like this:
Look down into your mirror, and start exactly where you started at before.
We are going to create something called a “Scalene” triangle on the top of the eye, so start where you started at before and draw a triangle downwards towards the lash line.
Your triangle should look something like this:
Looking down down into your mirror, begin at your tear duct and follow the natural lash line up to meet the scalene triangle.
Now comes the tricky part, a lot of people blink when this happens, so take your time when doing it. Look straight into your mirror and turn your brush, you are going to begin by starting at the tip of the tear duct and moving your way in.
And there you have it!
I would like to point out that I got this instructions from SarahVictor’s youtube channel. If you would like to see the full tutorial please click here: http://www.youtube.com/watch?v=ff6O-nlPv_c

Review Time: Estee Lauder Moisture Binding Mascara


Price: $21.00
Where to buy: Estee Lauder counters, Esteelauder.com
What it claims to do: Defines, conditions lashes. More Black impact. Defines each lash from end to end with a continuous stroke of color.
Here’s what I think:
I wasn’t planning on writing a review on this mascara for a while longer since I just did one for the Bareminerals Flawless definition Mascara, but the “deal breaker” happened today, so here it is: Up until this morning I absolutely adored this product. I applied it early today when I was getting ready for church and while I was putting it on my lashes I kept thinking “this mascara is awesome, I can’t even clump my lashes even if I wanted to” And I was really trying to, I wanted to see how much it would take for me to mess it up. The truth is that I wasn’t able to. The application was so incredibly smooth, the wand that it comes with is perfect, you get just the right amount of product on your wand, no need to wipe it off and after applying just one coat my lashes looked next to perfect. They were defined, I achieved exactly what this mascara promised I would.
So what happened? Well, for all of you that don’t know this yet, I am 33 weeks pregnant and on the way to church my “hormones” got to me (it was a long morning getting ready, I was pretty grumpy) and I started crying. I was really self conscious about it because I didn’t want my makeup to get ruined, but the little crying I did was enough. Let me tell y’all, this mascara is perfect up until any kind of moisture gets near your eyes. As I was carefully wiping away my tears I noticed TONS of this black liquid all over my fingers. I know this is not a waterproof mascara but I honestly expected it to last a little longer than a few seconds after my tears touched it. I have used drugstore brands that last longer when wet or if they do come off, is not as much as this one did (hope that made sense).  I think this would be a perfect product if it came in a waterproof form as well, but it doesn't and for that I give it a 8 out of 10.
So, this is my bottom line: Do I recommend it? Well, if you are completely sure that you won’t be crying when wearing it or that it won’t rain that day either, then YES. This mascara is perfect if dry. But if you are not sure about being able to keep it dry, or if you have oily eyelids, or you are going to be sweating, than NO. You be the judge of that yourself.
Would I buy this product again? Yes, I would. I will be more careful though on choosing the days when I will wear it. I don’t have oily eyelids and I don’t cry often either so I think this mascara will work fine most of the time.
However, this is not a mascara I would recommend if you are looking for volume or length (i.e. if you are going for a dramatic smokey eye look). This mascara defines your eyelashes, but it doesn’t give them volume or length.